My favorite nucs from Brushy Mountain, Free Shipping on Black Friday

Many of you may have heard me commenting that though I love Brushy Mountain Bee equipment I don’t like the expense of having it shipped. Well now is the time to buy. Free shipping on Black Friday. I don’t get any benefit from passing this on, I just think it is important to tout good quality and I think their western nucs are the best on the market:

Beekeeping equipment

Free shipping from Brushy Mountain

Link to my favorite Nuc click here.

Winter – The season for the beekeeper to get strong

Here we are, late fall staring down the barrel of winter. The rains are driving and the winds are blowing. Our hives are all tucked in, tied down and sugared up. Other than doing a quick visual inspection on the next warmish sunny day and maybe replenish the sugar, we have done all we can do to get the bees through this winter.

We spent the early spring setting up the hives and feeding our bees, the late spring and summer building up our hives. We spent our weekends counting sticky boards, adding supers, estimating brood, cutting out drone comb and watching for signs of a swarm. We’ve tried to systemize our inspections, take copious notes and all the while staying observant. On the lookout for robbing, pests, varmints and disease. All our efforts for the bees. A singular focus to help them stay healthy and grow strong.

Now it is our season. The time for us to feed our brains with new information for the next bee season. Time to read the books we heard about but haven’t had time to open. Time for chores, record review and plans for the new season. Time to renew our subscriptions to American Bee Journal or Bee Culture magazines. This is a great opportunity to fix any of your boxes that are in need of repair and build your list of tools and equipment you will need for next year.

I know the internet is working overtime to eliminate everything printed…but there is nothing better than snuggling up on a cold winter day, a hot fire, drink of choice and a nice stack of bee magazines, product catalogs and bee books.

Here is to a nice long winter….the season of the beekeeper.

Quick Guide to Bee Equipment providers:

Beekeeping in Seabeck

Food for the beekeepers brain

Bee Thinking

Better Bee

Brushy Mountain Bee Farm

Dadant

Glory Bee

Mann Lake

Pigeon Mountain

Ruhl Bee Supply

Western Bee Supply

Preparing your beehives for winter and building sugar boards

As I approach my first winter in beekeeping the biggest hurdle yet to overcome is keeping my bees alive throughout the winter. Even the most experienced beekeepers struggle with this. So I’ve set some milestones for myself and will go into this season on purpose…so that if I completely blow it I’ll at least know what not to do next year.

My goal: have all 3 hives alive on April 1, 2013.

Going into the winter it is important to have plenty of stores for the bees. Ideally I’d like to have about 50 pounds of honey in the comb so that the bees have plenty to eat. It is also important to have a low verroa mite load so that the bees have a good chance of making it.

I checked my hives a few weeks ago and as usual…good news and bad news. The good news is that I seem to have a low mite count. In one hive I have 25 mites that dropped in a 24 hour period and on the other only 14. My target was less than 24 mites per 24 hour period….I think I’m good on this issue.

On stores…..not so much. Very little honey in the comb. 2 to 3 frames in one and less than that in the other. The nuc has maybe one full frame of honey.

My plan of action based on my hive inspection:

1) no mite treatment

2) Feed sugar water through Oct then switch to sugar and pollen patties.

The reason you cannot feed sugar water all winter is because the ambiant moisture is so high the bees would not be able to store the sugar water in the comb and then get it down to below 18% humidity. Anything above 18% and it will spoil giving the bees dysentery.

Above is a video showing how I built the sugar boards. A nice 1 day project to improve the chances your bees will survive the winter.


The Annual Driving of the Drones

Driving of the drones, the movie

Each year the drone bees are driven from the beehive in preparation of winter. Since the males serve no purpose to the hive other than mating services, as winter approaches they are quickly identified as consumers and are driven away to preserve the food set aside for winter.

Some specifics of a drone bee:

The drones are male

They are larger than the female

The drone typically has a dark or black abdomen

Only about 2 to 4% of the total hive population is male

The drones have large eyes

The main function of a drone bee is to mate with a queen bee. Since mating happens “on the wing” the large eyes allow a better chance for the male to spot the queen in the air so that he might mate with her. This is his only function. The drone bee does nothing in the hive, no house keeping, rearing of the young or foraging. In fact the male does not even have a stinger. A honeybee hive is a female dominated society.

What you will see in the video:

Bees coming and going

Some of the bees will be carrying pollen in the pollen baskets on their rear legs.

The largest bees are the male or drone bees.

You will see the females chasing drones out of the hive or over the edge of the landing platform.

You will see females riding the drones, though they typically do not sting the drones they are known to damage the drones wings and inflict damage on them that will disable them.

It is not uncommon to see females drag undeveloped male larvae out of the nest as fall approaches.

The driven drone will usually only last a few days outside of the hive. The cooler temperatures, predatory birds and other insects will typically aid in the final chapter of a drones life. It is not until next spring that the queen will once again begin laying male eggs to begin the cycle anew.

Watch carefully as the large male bees are escorted, driven, herded and cajoled out of the hive by the females.


Boardman feeder that feeds sugar water to beehive

Drama in the bee yard because of rookie mistakes

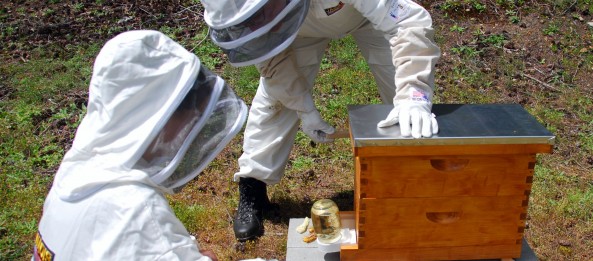
A couple of weeks ago I noticed that the Italian queen in one of our hives, that we call flowers hive, was not very agressive in producing brood or encouraging her troops to build out comb. So we made the decision to replace her. I contacted Pendall Apiary and ordered a new queen.

Italian Queen Bee in the mail

Queen Bee in the mail.

When she arrived I took the queen from flowers hive and moved her into a nuc box that I ordered from Brushy Mountain. I like this model because it has 1) screen bottom board 2) telescoping cover 3) inner cover with notch to provide a top entrance 4) western size.

I took two frames from the flowers hive and brushed another frame of bees into the nuc. I then took the new queen and placed her into the flowers hive with a marshmellow in the queen cage. I popped a boardman feeder on the nuc and hey…..we are off to the races. I’m feeling all warm inside that I’ve just overcome my first apiary challange….I’m the king of the world….wouldn’t you think????

The Aftermath:

I noticed a lot of activity around the nuc hive. Wow, I thought, these bees are doing great! As time went by and I actually spent some time

Boardman feeder that feeds sugar water to beehive

Boardman Feeder..dinner bell to the masses

watching the entrance to the nuc, I saw far more activity than I would expect from this little colony…soon a different story began to emerge. I noticed what I would call “guarding” agressive behavior at the entrance. Each bee was frisked down by a sentry bee and in many cases I saw the guardian chase off another bee. I saw more bees coming and going than was appropriate for this small nest. I really got the picture when I saw two bees fight to the death. I knew that I had to open this box up and see what was happening.

The next weekend I pulled the nuc appart and what I saw was very telling of my mistakes. I saw fewer bees than I put in, I saw zero comb fill. Nothing in two hanging frames of comb…no honey, no brood, no pollen. I also saw lots of dead bees on the bottom screen. These poor bees were literally being robbed to death.

My immediate actions:

1) Remove the boardman feeder

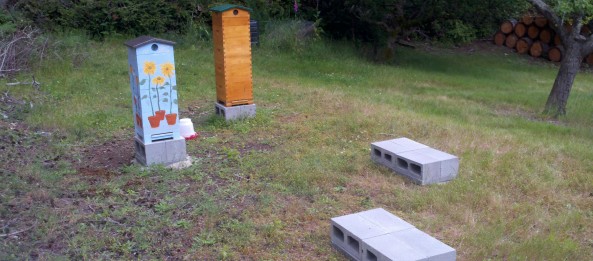
2) Set up a winter type feeder, mason jar full of 2 to 1 sugar water feeding through the inner cover hole with another box around that with the telescoping cover on top

3) Blocked down the main entrance to zero, opened a top entrance on the back of the hive. Small and easy to defend. (I love this feature on Brushy Mountain inner covers, a notch that can be opened or closed to form an upper entrance.)

4) Brought over more frames of brood and honey and brushed in another two frames of bees.

My mistakes were killing my bees and I felt bad about it. My mistakes:

A – I did not give my nuc enough resources to make it. I learned later in an advanced beekeeping class that our club, West Sound Beekeepers Association puts on that when making up a split or nuc you should provide; 3 frames of brood and 2 frames of honey and pollen plus brush in 2 to 3 more frames of bees.

B – Never use a boardman feeder. Other bees see it as an easy source of nectar and quickly move from that into the hives resources, before you know it you have a cavern instead of a beehive.

C – Block down the entrance of a nuc or new hive. They need to be able to easily defend themselves as they get built back up otherwise stronger hives around them might take advantage of the situation.

D- Even though I may have gotten away with it this time, I need to make a hive go queen less for 24 to 48 hours before introducing a new queen.

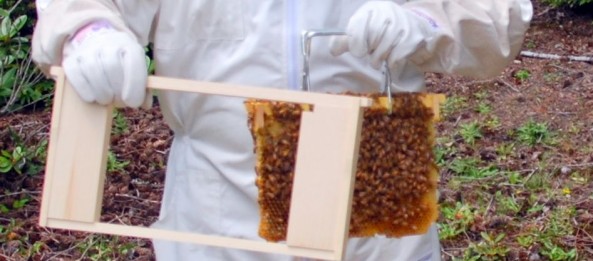
Last weekend I made an inspection of the nuc. I’m happy to report things have turned around.

Honey comb, Warre beehive, Langstroth bee hives

Bees have filled in the space around the warre topbar

I see new comb being built, honey being stored, brood in all stages and a calm group of bees. Will this be enough to make it over the winter???? Who is to say, but they are sure better off now that I’ve fixed my original mistakes.

They say bess die because of; weather, pests, poison, starvation and bad beekeepers. Hopefully it is early enough in the season for these bees to recover from my rookie mistakes.

Varroa Mites infect beehives

Checked Hive for Varroa Mites

Testing for verroa mites on honey bees

My version of a sticky board.

Today I checked Flower Hive for varroa destructor mites. There are several ways to do this, today I chose the least invasive way. My two warre hives have a slide board that I can slide in under the bottom screen. I taped a piece of wax paper onto the board and wiped some olive oil on it with a paper towel. I slid it into the bottom of the hive and left it there for 24 hours.

When I did this on my green roof hive a few weeks ago I didn’t find anything. This time I saw quite a few. I counted about 30 varroa

varroa mites infest beehives

varroa mites on sticky board

mites. Most hives will have some level of varroa mite infestation but when the drop count gets to 15 to 20 it is time to treat. There are quite a few ways to treat for varroa mites. I’ll not delve into those here except to say that they can become pretty chemically invasive.

We are trying to go as natural or as organic as possible. Now I’ll be the first to say that it is not natural to have powdered sugar fall from the sky onto an open hive but this is the method I chose. Dusting the hive

Varroa Mites infect beehives

Varroa Mite

with powdered sugar 1) clogs the suction cupped feet of the mites causing them to fall through the screened bottom board and 2) increases the grooming behavior of the bees so that they clean the sugar and the mites off of each other. If I had a solid bottom board hive the mites would be more likely to fall to the bottom, shake off the sugar and climb back up on the next passing bee. The screened bottom board adds ventilation to the hive and also creates a way for the mites to fall out of the hive.

I’ll check in a week or so with another olive oil slicked board to see how well this treatment worked.

Treating Varroa Mites with Powdered Sugar

Powdered Sugar Treatment for Varroa Destructor Mites

Adapter to allow inserting a warre frame into a langstroth hive

Easy way to shift Warre top bars to a Langstroth Nuc

Though there are many positive aspects to Abbé Émile Warré (1867-1951) beehive design, one of the drawbacks is the incompatibility between it and other hive systems. As I’m learning more and more about starting splits, queen rearing and using nucs in the classes offered by West Sound Beekeepers Association I’m seeing how much of a hassle it is to work between Warre and Langstroth hives.

In this particular case I wanted to start a split using several frames of brood and pollen and several frames of honey. Typically you would take these from one or more strong hives and just move the frames into a nuc, however the Warre bars are quite a bit shorter than the Langstroth nuc…so what to do….what to do?

Adapter to allow inserting a warre frame into a langstroth hive

Warre frame adapter

One option is to build an adaptor. This will allow you to slide the smaller Warre bar with its comb into a frame that will then fit into a Langstroth nuc. Fortunately for me I have a friend/fellow beekeeper who is a master wood worker. Darren, House of Bees.com, built a slick frame that allows just that. You can see to the side what it looks like.

Another option is one I devised on the fly before Darren proposed his Warre adapter. Simply take the top bar of aLangstroth frame and

Zip ties to connect warre top bar to a langstroth beehive frame

Zip ties used to attach larger langstroth bar to a warre topbar

beekeeping warre bee hives
zip tie connecting the two bars

lay it along the top of the Warre bar. Run two zip ties through the comb and around cinching the two top bars together. Then simply hang the combination into your nuc or other Langstroth hive. As you can see in the photo the bees are more than happy to fill in the space.

The big difference between the two approaches is that Darrens adaptor can easily be undone if you wanted to move the Warre bar back into a Warre box. My zip tie method would be a little messier.

Honey comb, Warre beehive, Langstroth bee hives

Bees have filled in the space around the warre topbar


Building a foundation for your beehives

Bees, you can’t eat just one….

I think I might have the Lays Potato chip syndrome when it comes to bees. I started out with two hives, after all, that is what all the books say to do. This way you can compare one to the other and get a better understanding of bees and how they live. That was in class #1. It is only in class #6 do you learn about swarming.

Swarming is a colonies natural instinct to ensure survival of the colony and despite man’s best efforts you will usually have a swarm in at least some of your hives. So, this means I should probably have a couple of hive bodies and some frames set aside just in case I come home from work one day to a buzzing mass of beemanity in my yard (read more likely my neighbors yard) and have some plan in place to deal. It is a natural extension that if I have to add a hive I’m going to need someplace to keep it….so here is a list of what I did and how I set up two more foundations. This is very similar to setting up my original two but these are a little bigger. You can read that post by clicking here.

The reason these foundations are bigger is because I’ve decided to go with 8 frame westerns as I expand my apiary. I purchased a nuc from brushy mountain and 5 unassembled western 8 frame boxes from Mann Lake. I think this will allow maximum flexibility with dealing with a swarm and swapping frames from hive to hive if I need to. To accomodate the larger hives here is my parts list for two foundations:

4 16x16x2 cement pavers

8 8X16X6 concret blocks

Left over bag of sand from my first two foundations

I like to use the 16×16 pavers because they are easier to level, then put the concret blocks on top to give me a little height and to allow me to run a web strap over the hive and through the concret blocks. This will add some stability in the winter time when the winds pick up.

So this year I may end up with 3 or 4 hives….what happens next year if say 2 or 3 of the hives swarm….there you go….you can’t eat just one 🙂


Honey bees seem to love scotch broom. Beekeepers see this annually in the pacific northwest.

Cheeto Bees

Scotch Broom a plant that flowers in May and covers honey bees to look like Cheetos

Cheeto bees are a common site this time of year in the Pacific Northwest. You do not have to look far to see a field of scotch broom in bloom. Once thought of as a good idea to   plant along our freeways now many people see this as an invasive plant that is not native to our area.

I’ve read several articles that indicate that honey bees do not like scotch broom, yet the ones I see in our neighborhood usually have bees around them and they sure come back to the hive covered in yellow, almost like they had been playing in a bag of Cheetos.

A bee from the beekeepers digest apiary

Cheeto bee

Honeybees with mad cow disease?

No, these honeybees do not have mad cow disease….they are doing what is known as a waggle dance.

Bees use the waggle dance to communicate the location of food or lodging to her colony mates. As they circle you will see them waggle in a specific direction. The top of the circle, or 12 o’clock, is the location of the sun. So if they are waggling to the left of 12 o’clock the direction they are communicating is to the left of the sun. If they are waggling say at 2 o’clock then she is telling her nest mates that there is food at about a 45 degree angle to the right of the current position of the sun.  The length and veracity of the dance communicate the quality of the food source as well as the distance to the food.

Waggle dances are also used to communicate the new location of a nesting site when a colony swarms. If you took the time, and had the inclination to snuggle up to a swarm you would be able to watch as several bees fly back to the swarm and begin doing different waggle dances as they try to win over their sisters as to which location is best suited for the swarm. They have already made a recon flight, found what seems to be a good location based on factors like, entrance size and size of the cavity, made their way back to the swarm and begun telegraphing this information to the others in the swarm through the dance. You would also be able to watch other bees take note of the dance and fly out to look at the proposed location for themselves. As time goes by more and more of the bees become convinced that one of the locations is better than the rest, at which point the swarm moves as a whole, protecting the queen as they move to their new digs.

Honeybee Democracy by Dr. Thomas D. Seeley makes for a great read on this whole fascinating topic.