A cool bee escape for the Warre bee hive

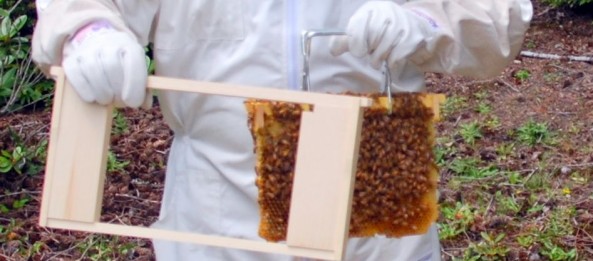
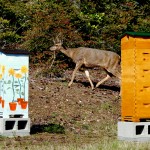
I have a Warre hive that overwintered this year. As a result the bees came into this season strong and ready to collect honey. The top box in my Warre stack is heavy with honey so I hope to have my first honey harvest. The challenge at hand is how to get the bees to move out of the box that I want to harvest.
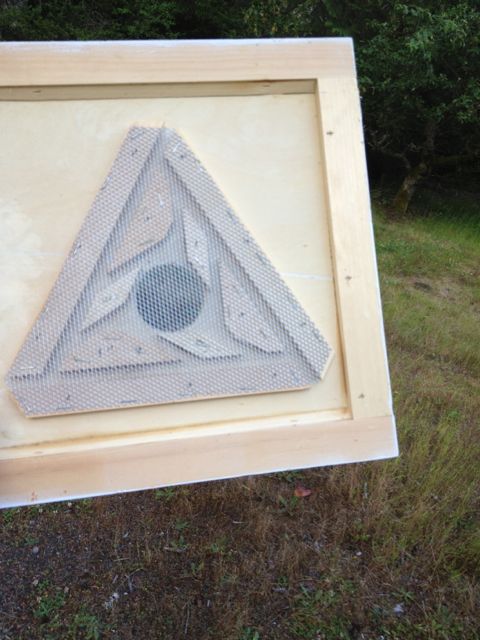
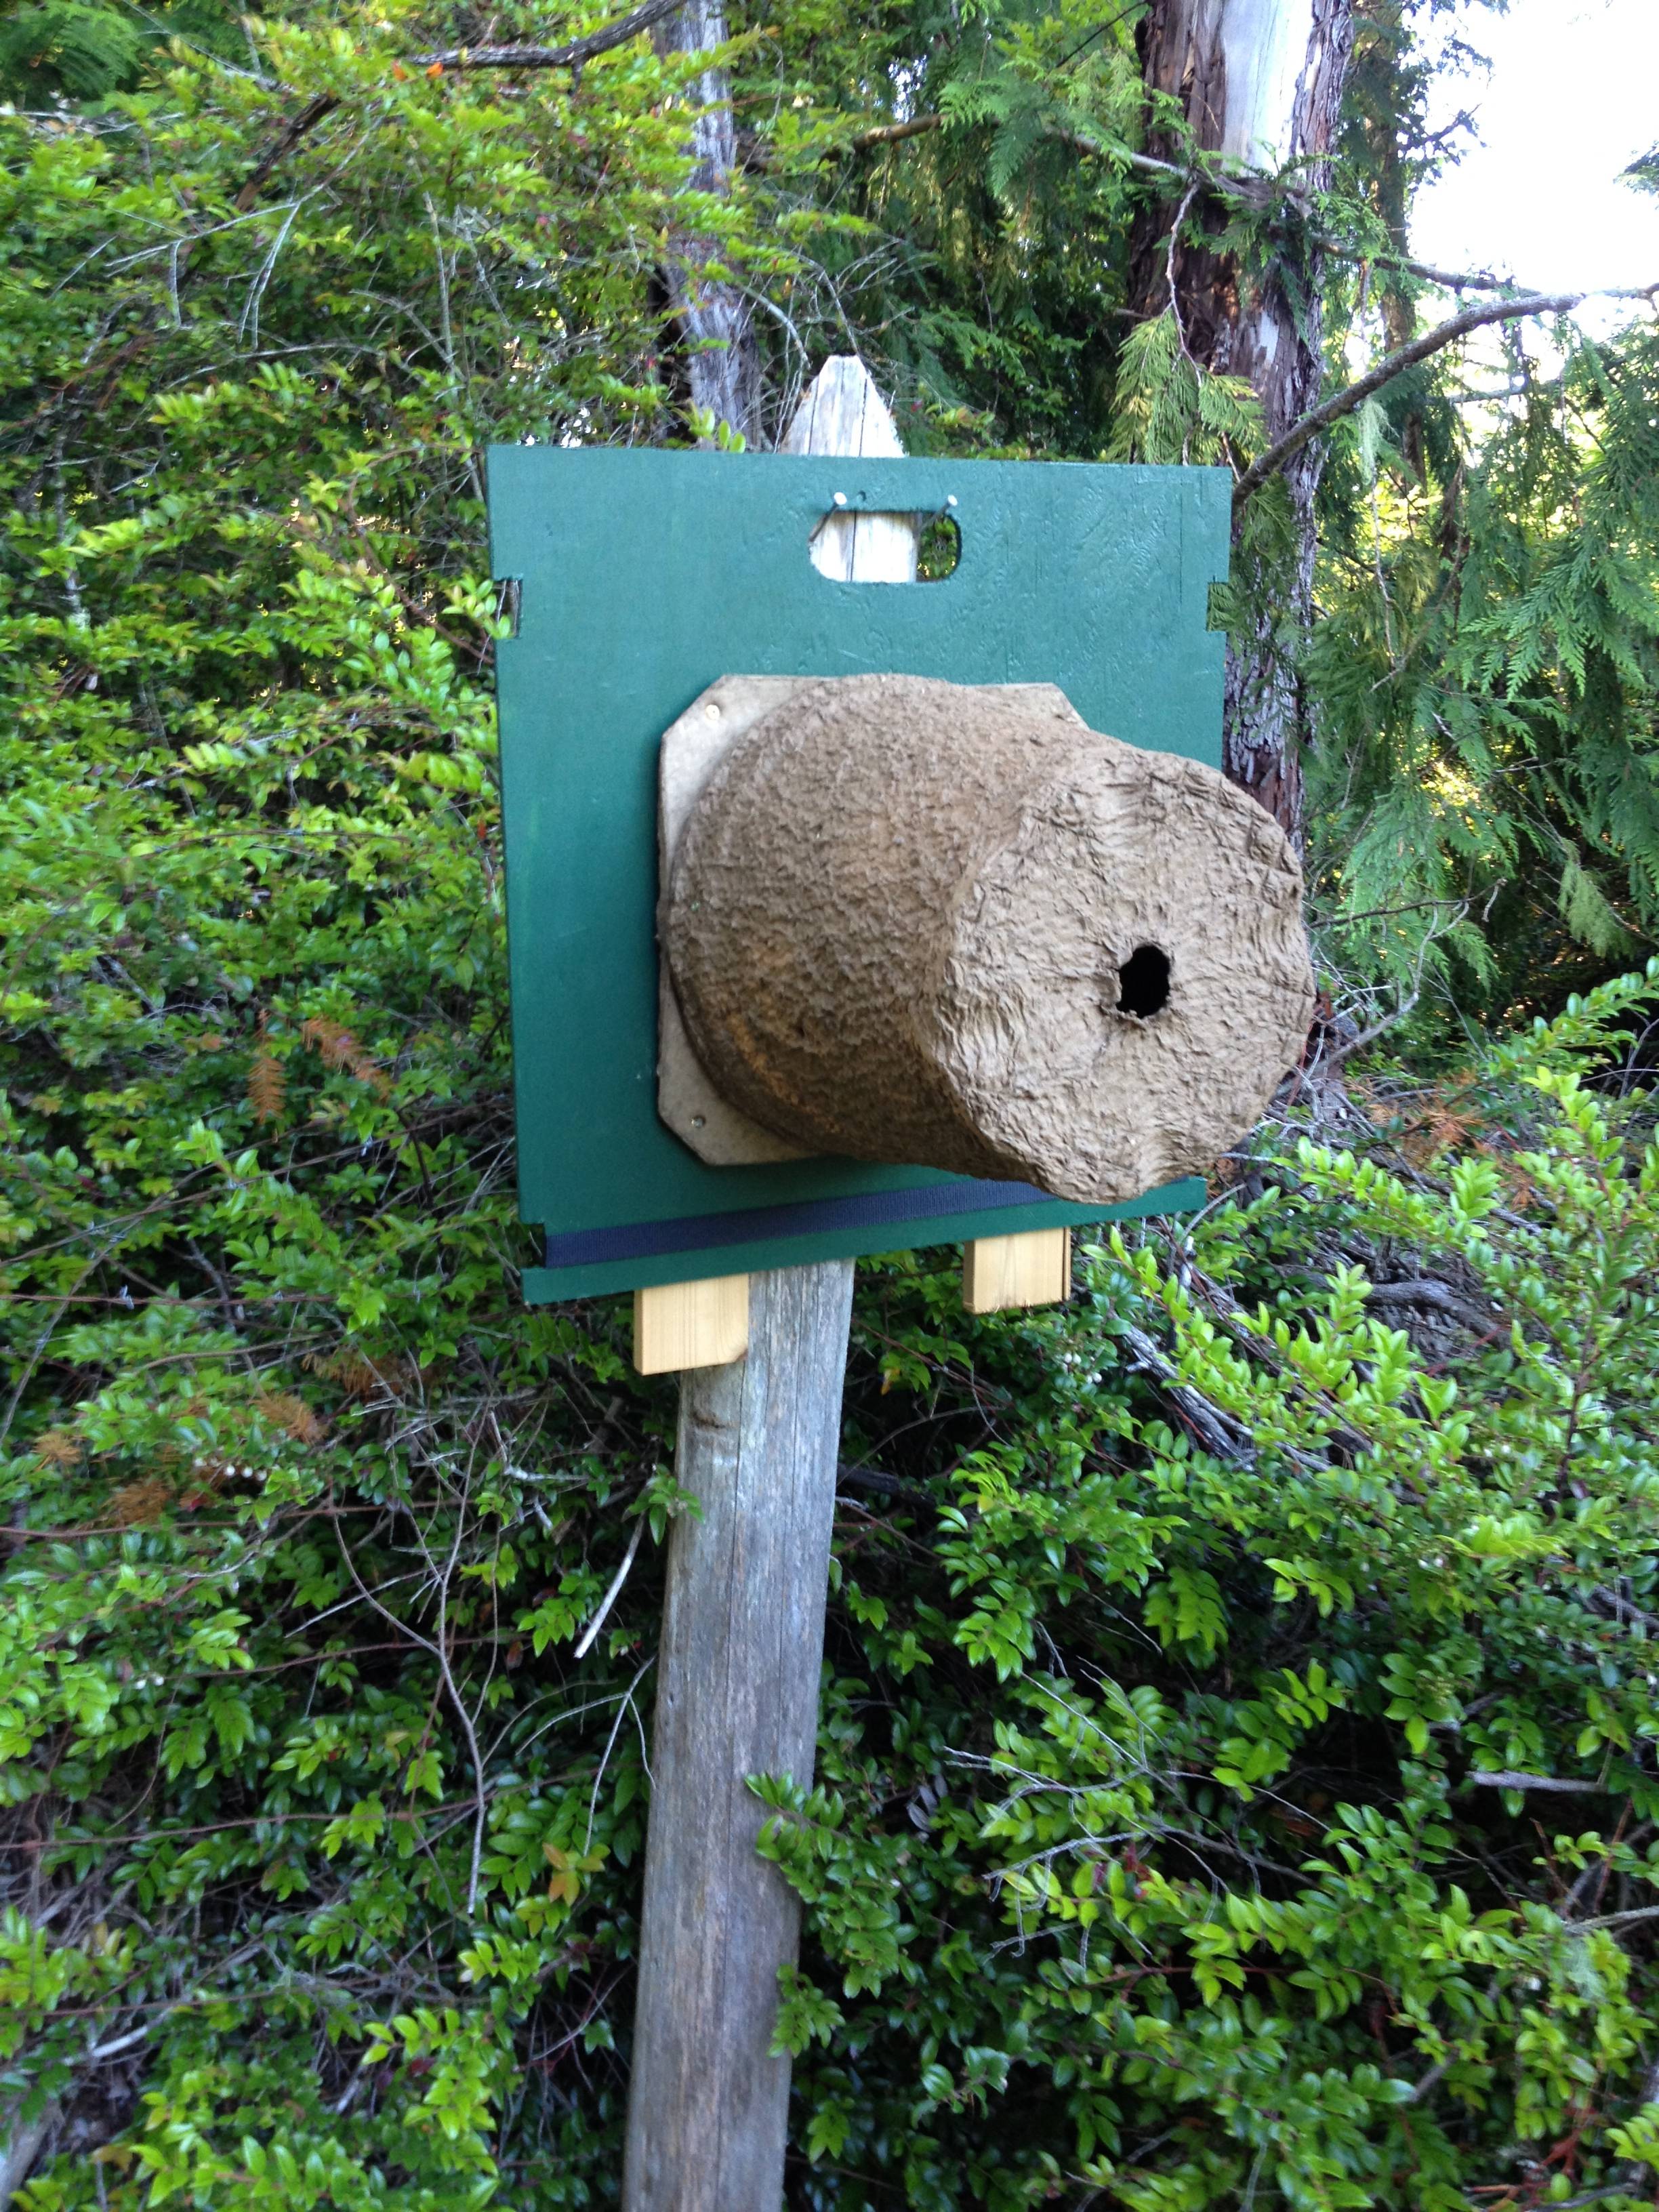
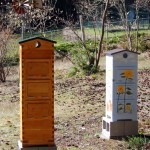
Warre Bee Escape

Warre Bee Escape

There are several ways to encourage the bees to move. One is the use of a fume board. This is a cloth covered board onto which you spray or pour a chemical that really smells bad to bee noses. This drives them down the stack into the box below. Another way that I’ve read about is using a power blower. Remove the box and send a stream of air through the box blowing the bees south. Neither of these really appealed to me.

Darren from House of Bees, the craftsman that built my Warre hives, made some cool bee escapes. These give the bees a way down but due to the little maze he has made they don’t know how to get back. I’m placing the bee escape under the top box and hoping the bees will go down and out of the hive and then not come back into the box I want to harvest. Right now it is packed with bees so it will be interesting to see what happens.


The Trap is Set…….Bee Fishing

Jess and I put out a swarm trap this year. Hard to say if it will work but here are the specifics.

Swarm season in the Pacific Northwest starts in May and runs through August depending on the weather and the nectar flow. Since this is the season we figured it could not hurt to try. We used one of the swarm traps that is available from several places…we got ours from Brushy Mountain. It is made of a wood pulp type product so will wear out over time and weather. We mounted it to a piece of 2′ x 2′ plywood that I cut a handle into the top and some strap notches in the sides. The goal here is to be able to hang it from a nail (if driving a nail is appropriate) or using nylon straps to strap it around a tree trunk.

Swarm Trap in SeabeckI read lots of opinions on how to place the trap, which direction to face and how high it should be off the ground. You can get frozen in the thought process….my recommendation is just pick a place and run with it. There is always next year to try a new location. I’ve also had several stories within our club, West Sound Beekeepers Association, in which a swarm decided to move into a hive that happened to be empty but still in the yard…so I think the bees pretty much figure things out on their own.

Our hive is facing south east, so the morning sun hits the entrance and it is hanging from a nail on a post about 5 feet off the ground. I did put a piece of comb on the inside so that the smell would permeate the trap.

Stay tuned, if we catch a swarm I’ll let you know.

As you can see based on the post date it is July, we actually hung the trap the first part of June, I just didn’t get around to making a post until now. As the season wears on I’m less excited about a swarm…an old poem tells the tale:

A swarm in May is worth a rick of hay.

A swarm in June, worth a silver spoon.

A swarm in July isn’t worth a fly

I think the sentiment here is the later in the season a swarm sets up shop in a new home, the less time there is for them to draw out new comb and stock pile resources for the winter. If we were to catch one now I might just combine it back into a weaker colony.

The language of bees

For the past 9 or 10 years we have been sponsoring a girl by the name of Kadiatou, who lives in Mali Africa. We make a small monthly donation through World Vision which helps to improve her quality of life and the overall program supports schools in her village. We receive updates and pictures a couple of times a year and we are encouraged to send her items that will fit in a small envelope as well as to write letters to her.

World Vision, Mali Africa, Beehives, Beekeeping, African Bees

World Vision helped me get hives to a family in Mali.

We often find these letters a bit difficult to write. We have very little in common and     are careful to not include a lot of detail about material items. Lets face it….the average American can not relate to the daily struggles that the average African villager has to face, nor could an average 14 year old girl from Nonsombougou, Mali have any concept of what it is like to live in our world. We are not only separated by half a world but by language (she speaks French), religion, polotics, currency, life style, terrain, weather, education and basic daily concerns. As a result our letters are pretty generic. She writes to update us on her education, what her interests are and usually draws a picture….our letters include topics about the weather, animals, and encouragement. Each letter from us has to be translated from English into French…..and each letter from her needs to be translated from French into English. We did learn, however, that her Dad is a farmer. They plant sourgum and have a goat and a cow……which leads me to why this story is on my bee blog.

A couple of months ago I sent over an inquiry through World Vision asking if Mr. Traore, Kadiatou’s Dad, would be interested in adding bees to his farm. To my delight his answer was yes. A phone call and a couple of months of waiting we just learned that their bee equipment has arrived. I immediately sent out a letter to Mr. Traore congratulating him on his new arrivals. As I wrote the letter it occurred to me that now we have something in common, something we can both relate to on every level. We will have the same concerns, want to know the same things and will try to solve the same mysteries. We now share a common language……the language of bees.

If you are interested in sharing the investment in a hive click here….or you can click the beekeeper below to donate/invest in the whole set up for a new beekeeper. Your investment will change lives.

As I get updates from Mali I’ll post them here. In this way you can get a glimpse into beekeeping in the Pacific Northwest from me….and beekeeping in Mali Africa from Mr. Traore…..the newest beekeeper in our family.

World Vision Beehives

World Vision Beehives to Donate Click Here


Preparing your beehives for winter and building sugar boards

As I approach my first winter in beekeeping the biggest hurdle yet to overcome is keeping my bees alive throughout the winter. Even the most experienced beekeepers struggle with this. So I’ve set some milestones for myself and will go into this season on purpose…so that if I completely blow it I’ll at least know what not to do next year.

My goal: have all 3 hives alive on April 1, 2013.

Going into the winter it is important to have plenty of stores for the bees. Ideally I’d like to have about 50 pounds of honey in the comb so that the bees have plenty to eat. It is also important to have a low verroa mite load so that the bees have a good chance of making it.

I checked my hives a few weeks ago and as usual…good news and bad news. The good news is that I seem to have a low mite count. In one hive I have 25 mites that dropped in a 24 hour period and on the other only 14. My target was less than 24 mites per 24 hour period….I think I’m good on this issue.

On stores…..not so much. Very little honey in the comb. 2 to 3 frames in one and less than that in the other. The nuc has maybe one full frame of honey.

My plan of action based on my hive inspection:

1) no mite treatment

2) Feed sugar water through Oct then switch to sugar and pollen patties.

The reason you cannot feed sugar water all winter is because the ambiant moisture is so high the bees would not be able to store the sugar water in the comb and then get it down to below 18% humidity. Anything above 18% and it will spoil giving the bees dysentery.

Above is a video showing how I built the sugar boards. A nice 1 day project to improve the chances your bees will survive the winter.


Adapter to allow inserting a warre frame into a langstroth hive

Easy way to shift Warre top bars to a Langstroth Nuc

Though there are many positive aspects to Abbé Émile Warré (1867-1951) beehive design, one of the drawbacks is the incompatibility between it and other hive systems. As I’m learning more and more about starting splits, queen rearing and using nucs in the classes offered by West Sound Beekeepers Association I’m seeing how much of a hassle it is to work between Warre and Langstroth hives.

In this particular case I wanted to start a split using several frames of brood and pollen and several frames of honey. Typically you would take these from one or more strong hives and just move the frames into a nuc, however the Warre bars are quite a bit shorter than the Langstroth nuc…so what to do….what to do?

Adapter to allow inserting a warre frame into a langstroth hive

Warre frame adapter

One option is to build an adaptor. This will allow you to slide the smaller Warre bar with its comb into a frame that will then fit into a Langstroth nuc. Fortunately for me I have a friend/fellow beekeeper who is a master wood worker. Darren, House of Bees.com, built a slick frame that allows just that. You can see to the side what it looks like.

Another option is one I devised on the fly before Darren proposed his Warre adapter. Simply take the top bar of aLangstroth frame and

Zip ties to connect warre top bar to a langstroth beehive frame

Zip ties used to attach larger langstroth bar to a warre topbar

beekeeping warre bee hives
zip tie connecting the two bars

lay it along the top of the Warre bar. Run two zip ties through the comb and around cinching the two top bars together. Then simply hang the combination into your nuc or other Langstroth hive. As you can see in the photo the bees are more than happy to fill in the space.

The big difference between the two approaches is that Darrens adaptor can easily be undone if you wanted to move the Warre bar back into a Warre box. My zip tie method would be a little messier.

Honey comb, Warre beehive, Langstroth bee hives

Bees have filled in the space around the warre topbar


Building a foundation for your beehives

Bees, you can’t eat just one….

I think I might have the Lays Potato chip syndrome when it comes to bees. I started out with two hives, after all, that is what all the books say to do. This way you can compare one to the other and get a better understanding of bees and how they live. That was in class #1. It is only in class #6 do you learn about swarming.

Swarming is a colonies natural instinct to ensure survival of the colony and despite man’s best efforts you will usually have a swarm in at least some of your hives. So, this means I should probably have a couple of hive bodies and some frames set aside just in case I come home from work one day to a buzzing mass of beemanity in my yard (read more likely my neighbors yard) and have some plan in place to deal. It is a natural extension that if I have to add a hive I’m going to need someplace to keep it….so here is a list of what I did and how I set up two more foundations. This is very similar to setting up my original two but these are a little bigger. You can read that post by clicking here.

The reason these foundations are bigger is because I’ve decided to go with 8 frame westerns as I expand my apiary. I purchased a nuc from brushy mountain and 5 unassembled western 8 frame boxes from Mann Lake. I think this will allow maximum flexibility with dealing with a swarm and swapping frames from hive to hive if I need to. To accomodate the larger hives here is my parts list for two foundations:

4 16x16x2 cement pavers

8 8X16X6 concret blocks

Left over bag of sand from my first two foundations

I like to use the 16×16 pavers because they are easier to level, then put the concret blocks on top to give me a little height and to allow me to run a web strap over the hive and through the concret blocks. This will add some stability in the winter time when the winds pick up.

So this year I may end up with 3 or 4 hives….what happens next year if say 2 or 3 of the hives swarm….there you go….you can’t eat just one 🙂


Video showing break down of the Warre beehives that we are starting out with.

Several people have asked me about the details of the hives that we are using here in Seabeck. Here is a video that Darren from House of Bees put together that shows all of the aspects of this hive.

Darren does an excellent job with the craftsmanship of these hives.

You can also purchase plans from him if you want to do it yourself…click here for that link.

Setting up the hives for our new arrivals…in a couple of loooong weeks.

With the weather beeeing so nice I’m hoping that this will mean we will indeed get our bees as scheduled, the first Saturday in April. My guess is that it has to do more with what is happening in California which is where the bee packages are coming from.

As promised in my last post here are some pictures showing how I placed the hives and how they turned out. If you ask 10 different beekeepers how to build a base you will come up with 10 different answers. Right or wrong here is how I did it for my first time.

These hives have the entrances facing south and are in full sun most of the day.

I have screened baseboards….if I didn’t I might want to have the hive lean a little toward the hive entrance so that condensation would have an easy way out of the hive.


Painting your new bee hives

Painting our hives

We spent the weekend getting our two warre hives ready. Bees will be here in 3 weeks or so. I’ve seen quite a bit written about painting your bee hives so to save you the time here is what I’ve reduced it down to:

Color: color does not really matter though keep in mind that light colors reflect the heat away from the hives and dark colors attract the heat. For me, where I live the darker the better as beeks in our area seem most concerned with keeping their bees alive throughout the winter. If you only have a couple of hives you can afford to get decretive. In our case my wife is painting one and I’m doing the other. She is planning a colorful design while mine will look like a log house, green roof and golden brown sides. If you had 20 hives to paint I’d recommend a spray gun or roller to cover as much territory as quickly as possible….maybe that is one of the benefits of being a backyard beekeeper, small scale.

Type of paint: Latex, water based exterior paint. Low VOC would probably be the best but if you used regular VOC paint and let them sit for a few weeks I’m sure there would be no problem. Stay away from oil based paints. In our beekeepers class they really pushed for you to use leftover paints that you or a neighbor might have left over from your last project.

What to paint: Just paint the outside. Do not paint anything the bees will be living on. Your goal is to protect the wood from the elements while realizing that over a few years your hives will age. All of the bars, frames, inside walls, ceiling and floor should be untreated wood.

My warres are 16” x 16” so I’m putting down a 16 x 16 inch square paver that I’ll level with sand underneath and then on top of the paver I’m placing two 16 x 8 in cinder blocks side by side with the holes on the side. This way if it is getting stormy I’ll be able to run a nylon strap around the stack and through the cinder blocks to add stability.

I’ll post pictures of the paint job as well as how I have them placed in the yard next week.

Time never goes so slow as when you are waiting for your first package of bees…..