Honey Bucket and My First Honey Collection

Subscribe to The BeeKeepers Digest

Last year I left all the honey in the hives for the bees to use over the winter. This year however, early in the season I found almost a whole box of honey plus some more stored in the box below....so, some for me and some for the bees.

Typically beekeepers use a langstroth type of hive with frames that either have wax or plastic foundation on them. To collect the honey they use a hot knife to slice off the thin cappings on both sides of the frame, then put several frames in a spinning machine to use centrifugal force to spin the honey out of the comb.

In my case however I'm using Warre hives. The bees start with nothing more than a top bar from which to hang their comb, so I use the crush and strain method to separate the honey from the comb, not nearly as pretty but it gets the job done.

Step one is getting the bees out of the box of honey you want to collect. I put a bee escape below the box I wanted to collect. Check out this blog post for more details on that. I left it in place for about 10 days. Most of the bees were gone but there were some die hards that just would not give up the honey. No worries I was able to gently encourage them out as I pulled the frames.

honey comb smashed up

smashed comb

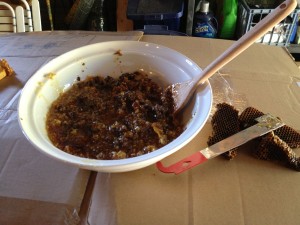
Next I found a big white bowl (color doesn't really matter) and a wooden spatula to do the smashing. I cut the comb off into the bowl (I did this away from the apiary as once the bees get the scent of honey you will be over run.) and began smashing it up. It really looks like a mess.....this is the "Crush" part of crush and strain.

Next I poured this sticky mess of honey and smashed wax into my separating system or you could also call it a Honey Bucket, not the kind you see on a construction site.....a real....honey.....bucket. This is two buckets stacked on one another. The top bucket has a nylon straining bag in it and has holes drilled in the bottom. the bottom bucket has a lid with the center section cut out of it to allow the honey from the top bucket thru. It also has a honey gate....or valve at the bottom. This system is the most natural way to collect honey as there is no filtering of the honey which could filter out pollen or other great nutrients the honey might contain. Here is a link to a couple of similar systems: Mann Lake - Brushy Mountain Bee FarmBeeThinking. I got mine from BeeThinking.

Honey Straining Bucket

Now, time to put the buckets out in the sun. Warm honey flows much better to the bucket below. ***Big note here --- When I do this again I'm going to wrap saran wrap around the seam between the two buckets. There is just enough space for bees to get in and I had to scoop several out who got in and could not get out**** By the next day all of the honey had moved to the bottom bucket leaving all of the crushed wax....and other goodies in the mesh bag above.crush and strain honey collection
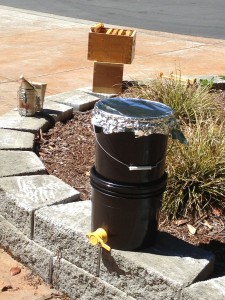
Honey Bucket in the sun
Filling jars of honey the best part of beekeeping

Filling the jars

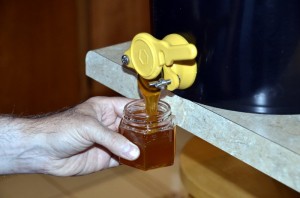
Now the fun part, pouring the honey into the jars. There are lots of choices when it comes to honey containers, jars and bottles which you can buy from most of the beekeeping suppliers. From here just make sure each jar has its cap screwed on tight and wiped down so there is no stickiness on the outside. Design and place a cool looking label on the outside and we are ready to roll.

Couple of notes; I did wash all of the jars before using them. Honey attracts moisture so if you can do much of the work in an air conditioned space the better. Too much moisture in your honey and it will spoil.

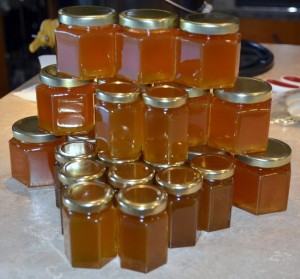
All told this first harvest was about 17 pounds of honey. The first of the jars filled with honey from seabeck farmshoney went to our bee friendly neighbors. That sounds like a lot of honey but as you can see not many jars.
I took the wax and melted it down and turned it into candles....I'll share that process in my next blog post.


Subscribe to The BeeKeepers Digest


Importance of Water and Good Neighbors to your Apiary

water feeder, bees, beekeeping

Easy inexpensive water feeder

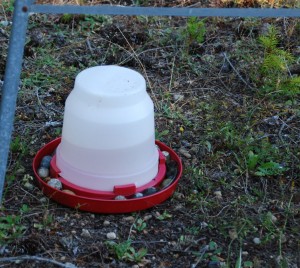
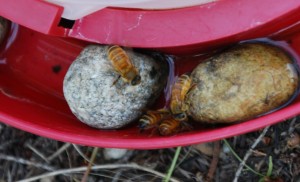
This is the time of year when it gets hot in our area. Availability of water is critical to the health of your bee hives. I found that an easy inexpensive water system involves a simple poultry water bucket that you can get from your local feed store. I find that this small one works great and I just put small rocks in the base to give the bees a place to perch as they get a drink. Because the top is somewhat clear I can see when it is getting low so that I can fill it up again.

Why do bees need water? When bees leave the hive they are collecting several raw materials; nectar, pollen, water and plant resin. Nectar is the carbohydrate, pollen the protein and the resin is turned into propolis and used to seal off the hive from the weather. The pollen, nectar and water are mixed together with bee saliva to form bee bread. The bee bread is what the bees eat and what is fed to developing bees. Many humans also collect and eat bee bread for its reported medicinal properties. Bee bread is comprised of:

55% Carbohydrates, 35% Protein, 3% Minerals & Vitamins, 2% Fatty Acids, 5% other stuff.

So, back to the water, we went on a short vacation. Before leaving I made sure everything was squared away in my apiary. Each hive was strapped down (in case a wind storm came up while I was away), set up a swarm trap, made sure the water bucket was full.

While I was away either it was really hot and the water evaporated….or a racoon or other wild animal drank the water. In any event when I came back the first thing I noticed was that the bucket was dry.

A few days after having filled up the watering can I noticed that there were no bees drinking from it. Earlier in the year I would always see a dozen or so bees at a time getting a drink….but now nothing…..odd.

A week or so later I was talking with my bee friendly neighbor across the fence. She noted that she loved seeing my bees drinking from a plant saucer that they have near a window at her house. I was at first concerned that my thirsty bees might be intruding, but she reassured me that both she and her husband liked watching them and that they happily kept the saucer full.

bees drinking water

Bee water park

So….two morals to the story; 1) Always keep an ample supply of water close by for your bees. In this case I was lucky, had it been a swimming pool or deck fountain even the best of neighbors might not be happy. 2) Keep your neighbors happy about your bees. Keep them informed when you are going to be getting them and let them know how they are doing…and of course they should always get the first of the honey when you collect it.

The Trap is Set…….Bee Fishing

Jess and I put out a swarm trap this year. Hard to say if it will work but here are the specifics.

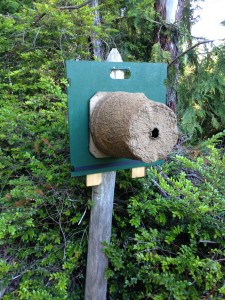
Swarm season in the Pacific Northwest starts in May and runs through August depending on the weather and the nectar flow. Since this is the season we figured it could not hurt to try. We used one of the swarm traps that is available from several places…we got ours from Brushy Mountain. It is made of a wood pulp type product so will wear out over time and weather. We mounted it to a piece of 2′ x 2′ plywood that I cut a handle into the top and some strap notches in the sides. The goal here is to be able to hang it from a nail (if driving a nail is appropriate) or using nylon straps to strap it around a tree trunk.

Swarm Trap in SeabeckI read lots of opinions on how to place the trap, which direction to face and how high it should be off the ground. You can get frozen in the thought process….my recommendation is just pick a place and run with it. There is always next year to try a new location. I’ve also had several stories within our club, West Sound Beekeepers Association, in which a swarm decided to move into a hive that happened to be empty but still in the yard…so I think the bees pretty much figure things out on their own.

Our hive is facing south east, so the morning sun hits the entrance and it is hanging from a nail on a post about 5 feet off the ground. I did put a piece of comb on the inside so that the smell would permeate the trap.

Stay tuned, if we catch a swarm I’ll let you know.

As you can see based on the post date it is July, we actually hung the trap the first part of June, I just didn’t get around to making a post until now. As the season wears on I’m less excited about a swarm…an old poem tells the tale:

A swarm in May is worth a rick of hay.

A swarm in June, worth a silver spoon.

A swarm in July isn’t worth a fly

I think the sentiment here is the later in the season a swarm sets up shop in a new home, the less time there is for them to draw out new comb and stock pile resources for the winter. If we were to catch one now I might just combine it back into a weaker colony.

Honey bees in the snow

Beehive, beekeeping, seabeck, bees, honeybees, overwintering bees

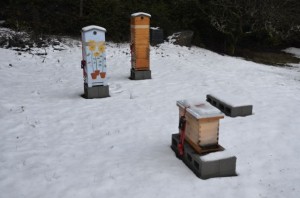
Bee hives like snow

It is December in Seabeck Washington. While our winters are very moderate compared to much of the country we do get snow from time to time. We just had two days of snow and our neck of the woods had over 10 inches. The days now are upper 30s and might get into the mid 40s this next week, the nights are in the lower 30s….in any case the snow will not last long.

A friend asked me today about the bees. What do they do when it snows? Do they hibernate?

This is the 6 million dollar discussion. How do you get the bees through the winter. This is the crux of what so many beekeepers struggle with each year. It is not unusual to have a 30 to 50% loss each year.

The bees do not hibernate. I consider hibernation like a sleep state. Bees remain active throughout the winter. They generate heat with the same muscles they use to fly. They flex or pump their mucsels in such a way that they maintain a core temperature of about 89 to 97 degrees F.

During warm weather bees come and go from the hive. Collecting and returning with pollen, nectar  water or sap. They also leave for cleansing flights as they do not defecate in their hive.

At about 64 degrees F the bees begin to cluster, that is collect closely together to preserve heat. There are two basic parts of the cluster; the core which uses its muscles to create the heat and the outer layer that acts as insulation for the core. As temperatures drop the cluster tightens. The bees rotate from the inner part of the cluster to the outer, taking turns generating the heat. The energy they use is fueled by the honey they eat or the sugar the beekeeper has given them if they do not have sufficient honey stored.

The queen slows down egg laying and stops all together for a short time all to preserve energy and make it through the winter. Some think that the winter solstice is what keys the queen to begin to slowly build up the brood again.

Beekeepers in areas with harsher winters may actually wrap their hives to better insulate them, making it easier on the bees. The typical advice when it snows is to leave the snow on the top of the hives, it acts as an insulator.

My goal now is to just check them on warmer days and ensure they have plenty of sugar….and hope I don’t suffer the 30 to 50% loss that others have.

Thank you Lee for this great question.


Resource for information in this post came from here: http://www.capabees.com/main/files/pdf/winteringpdf.pdf

Winter – The season for the beekeeper to get strong

Here we are, late fall staring down the barrel of winter. The rains are driving and the winds are blowing. Our hives are all tucked in, tied down and sugared up. Other than doing a quick visual inspection on the next warmish sunny day and maybe replenish the sugar, we have done all we can do to get the bees through this winter.

We spent the early spring setting up the hives and feeding our bees, the late spring and summer building up our hives. We spent our weekends counting sticky boards, adding supers, estimating brood, cutting out drone comb and watching for signs of a swarm. We’ve tried to systemize our inspections, take copious notes and all the while staying observant. On the lookout for robbing, pests, varmints and disease. All our efforts for the bees. A singular focus to help them stay healthy and grow strong.

Now it is our season. The time for us to feed our brains with new information for the next bee season. Time to read the books we heard about but haven’t had time to open. Time for chores, record review and plans for the new season. Time to renew our subscriptions to American Bee Journal or Bee Culture magazines. This is a great opportunity to fix any of your boxes that are in need of repair and build your list of tools and equipment you will need for next year.

I know the internet is working overtime to eliminate everything printed…but there is nothing better than snuggling up on a cold winter day, a hot fire, drink of choice and a nice stack of bee magazines, product catalogs and bee books.

Here is to a nice long winter….the season of the beekeeper.

Quick Guide to Bee Equipment providers:

Beekeeping in Seabeck

Food for the beekeepers brain

Bee Thinking

Better Bee

Brushy Mountain Bee Farm

Dadant

Glory Bee

Mann Lake

Pigeon Mountain

Ruhl Bee Supply

Western Bee Supply

Preparing your beehives for winter and building sugar boards

As I approach my first winter in beekeeping the biggest hurdle yet to overcome is keeping my bees alive throughout the winter. Even the most experienced beekeepers struggle with this. So I’ve set some milestones for myself and will go into this season on purpose…so that if I completely blow it I’ll at least know what not to do next year.

My goal: have all 3 hives alive on April 1, 2013.

Going into the winter it is important to have plenty of stores for the bees. Ideally I’d like to have about 50 pounds of honey in the comb so that the bees have plenty to eat. It is also important to have a low verroa mite load so that the bees have a good chance of making it.

I checked my hives a few weeks ago and as usual…good news and bad news. The good news is that I seem to have a low mite count. In one hive I have 25 mites that dropped in a 24 hour period and on the other only 14. My target was less than 24 mites per 24 hour period….I think I’m good on this issue.

On stores…..not so much. Very little honey in the comb. 2 to 3 frames in one and less than that in the other. The nuc has maybe one full frame of honey.

My plan of action based on my hive inspection:

1) no mite treatment

2) Feed sugar water through Oct then switch to sugar and pollen patties.

The reason you cannot feed sugar water all winter is because the ambiant moisture is so high the bees would not be able to store the sugar water in the comb and then get it down to below 18% humidity. Anything above 18% and it will spoil giving the bees dysentery.

Above is a video showing how I built the sugar boards. A nice 1 day project to improve the chances your bees will survive the winter.


Building a foundation for your beehives

Bees, you can’t eat just one….

I think I might have the Lays Potato chip syndrome when it comes to bees. I started out with two hives, after all, that is what all the books say to do. This way you can compare one to the other and get a better understanding of bees and how they live. That was in class #1. It is only in class #6 do you learn about swarming.

Swarming is a colonies natural instinct to ensure survival of the colony and despite man’s best efforts you will usually have a swarm in at least some of your hives. So, this means I should probably have a couple of hive bodies and some frames set aside just in case I come home from work one day to a buzzing mass of beemanity in my yard (read more likely my neighbors yard) and have some plan in place to deal. It is a natural extension that if I have to add a hive I’m going to need someplace to keep it….so here is a list of what I did and how I set up two more foundations. This is very similar to setting up my original two but these are a little bigger. You can read that post by clicking here.

The reason these foundations are bigger is because I’ve decided to go with 8 frame westerns as I expand my apiary. I purchased a nuc from brushy mountain and 5 unassembled western 8 frame boxes from Mann Lake. I think this will allow maximum flexibility with dealing with a swarm and swapping frames from hive to hive if I need to. To accomodate the larger hives here is my parts list for two foundations:

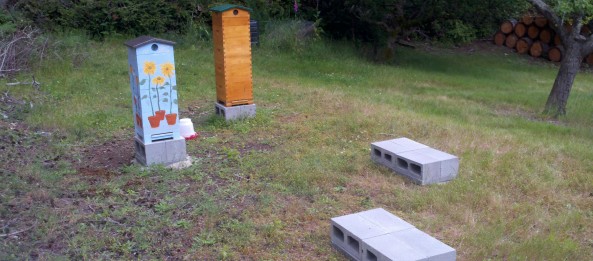
4 16x16x2 cement pavers

8 8X16X6 concret blocks

Left over bag of sand from my first two foundations

I like to use the 16×16 pavers because they are easier to level, then put the concret blocks on top to give me a little height and to allow me to run a web strap over the hive and through the concret blocks. This will add some stability in the winter time when the winds pick up.

So this year I may end up with 3 or 4 hives….what happens next year if say 2 or 3 of the hives swarm….there you go….you can’t eat just one 🙂